Teach with Frosty
Before there was Frozen’s Olaf, there was the one and the original snowman, Frosty! And boy, was he awesome with his high energy antics and ability to play, play, and play with the town’s kids! This is another warm holiday favorite of mine growing up, right up there with Rudolph the Red-Nosed Reindeer! Share this classic tale with your child this holiday season and help her make her own Frosty ornament for the Christmas tree.
Tell Frosty’s story. Frosty the snowman came to life one day after the first snowfall of the year. The town’s children started to roll snowballs in the yard. Round and round they rolled, until they had three round balls: large, medium and small. They stacked the balls to make a snowman, giving him two bits of coal for eyes, button for a nose, and a corn cob pipe. Just then, a silk top hat came blowing towards them. They picked it up and put it on their snowman’s head – and Zing! – Frosty came alive. Frosty and the children frolic throughout the day, playing in the snow and exploring the town. But as the sun shone down on them, Frosty knew he soon had to go.
In town, a gust of wind blew off his hat and away he ran after it. A policeman blew his whistle, stopping the children from running after Frosty because of all the traffic on the street. When the children caught up to Frosty, he was nowhere in sight. All they saw was an old silk hat rolling in melted snow. When the children asked, “Where did Frosty go?” The policeman answered, “Frosty the Snowman has gone away. Where all snowmen go on a sunny day. But he’ll be back at your bidding and call whenever great heaps of snowflakes fall.”
Sing Frosty the Snowman. There’s no better way for preschoolers to learn than through song. Sing the song version of Frosty that was adapted in 1950 and originally sung by Gene Autry. This song will not only help your child dive deeper into the story, but also have fun learning with phonics at the same time!
Daily Reflections: Ask your child to reflect on the story of Frosty the Snowman.
- If you were to play with Frosty the Snowman today, what would you like to do together?
- What happened to Frosty the Snowman? Where do you think he went?
- If you built a snowman, what special objects do you have that can bring her to life?
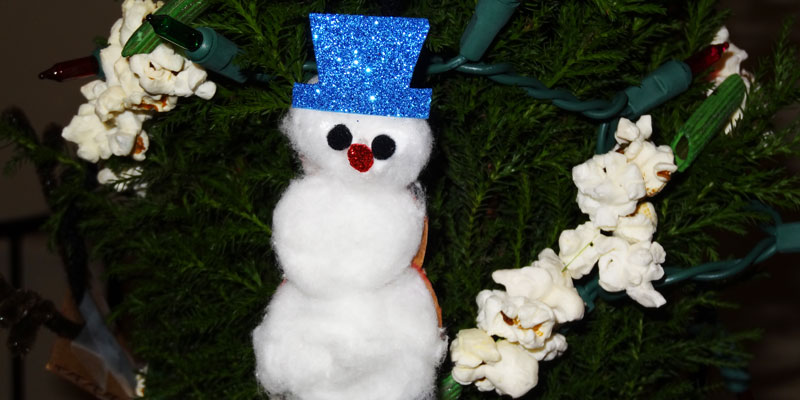
Make a tree ornament. Gemma and I created textured Frosty the Snowman ornaments for our DIY Children’s Christmas tree this year. She really enjoyed extending her story experience with this hands-on art project that supports her fine motor, dexterity, sensory exploration, and exploring shapes and sizes skills.
- Gather the materials:
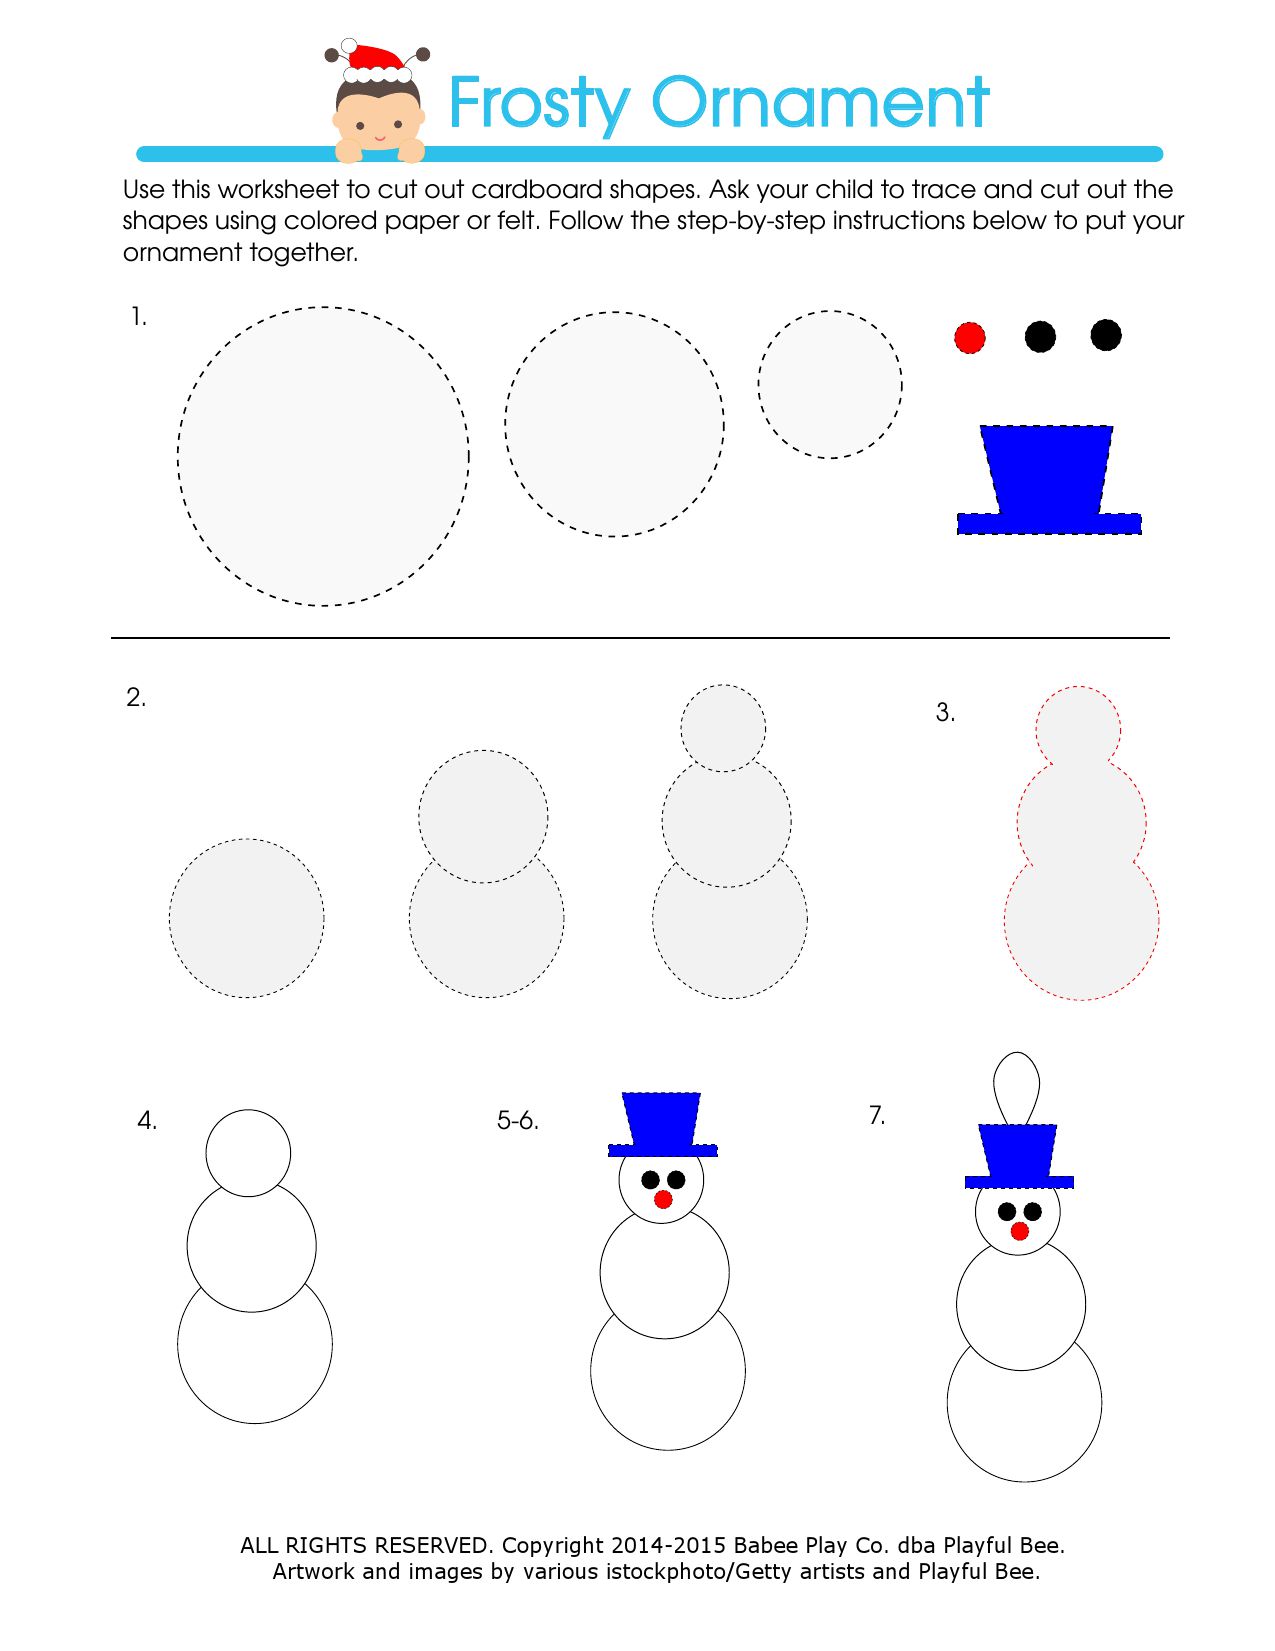
- Three different sizes of circle shapes (e.g. quarter coin, dollar coin, bottom of a yogurt cup) or use the Frosty worksheet.
- Cardboard
- Cotton balls
- Black colored construction paper or two mini pom poms
- Red colored felt or construction paper
- Blue colored felt or construction paper
- Yarn (green color is preferred)
- White craft glue
- Pencil or thin marker
- Tape
- Child-safe scissors and fabric scissors (if you use felt)
- Optional: Glitter glue
- Create your Frosty the snowman shape. On the cardboard, invite your child to trace in the following order:
- Large circle shape as the bottom of the snowman
- Lay the medium circle across the top 1/3 of the large circle. Trace the medium circle.
- Lay the small circle across the top 1/3 of the medium circle. Trace the small circle.
- Help your child cut along the outline of the snowman shape. Consider highlighting the outline of the snowman shape with a highlighter to make it easier for your child to follow when she cuts.
- Shape and Glue. Shape the cotton balls into three flat circle shapes that will fit the snowman’s body and head. Glue the cotton circles onto the cardboard shape.
- Trace and Cut. Draw a pair of black eyes and nose using the black and red construction paper. Trace and cut out a top hat using the blue construction paper.
- Bring it to Life. Add details to the head by gluing the black paper eyes and red nose for the face and the blue hat on top. If your child likes, she can further embellish with the glitter glue.
- Hang and Display. Cut a 4-5 inch length of yarn to form the loop that secures the ornament to the tree. Tape the loop to the back of the ornament. Set the ornament aside to allow for drying before decorating the tree.
- Download your free Frosty the Snowman Worksheet.
P.S. This is just a rough guide on how we made our Frosty. If your child wants to deviate and add his own magic to the ornament, go for it!
P.S.S. Don’t have all of the materials listed above? Not a problem! You can do this craft using plain white paper and crayons!
Learning Foundations: Science Knowledge, Sensory Exploration, Following Rules and Routines, Appreciation of Books and Stories, Music Appreciation and Creation, Phonological Awareness, Small Muscle Movement and Dexterity, Exploring Shapes and Sizes.
Yvette Hwee
Latest posts by Yvette Hwee (see all)
- Physical Play Keeps Tantrums Away - June 7, 2017
- Finding the Secret Sauce to Your Baby’s Tummy Time - October 17, 2016
- Hundreds Chart: Teach Your Preschooler To Count to 100 Today! - September 2, 2016
+ There are no comments
Add yours